For the whole story, click here. For the previous part of the story, click here. For the next part of the story, click here.
Meanwhile, of course, the chassis needs attention while the body is being painted. Earlier in the process - and not well photographed - the chassis was cleaned thoroughly, wire-brushed or otherwise de-rusted wherever corrosion was found, and painted, mostly with POR-15, but in some places with basic enamel.
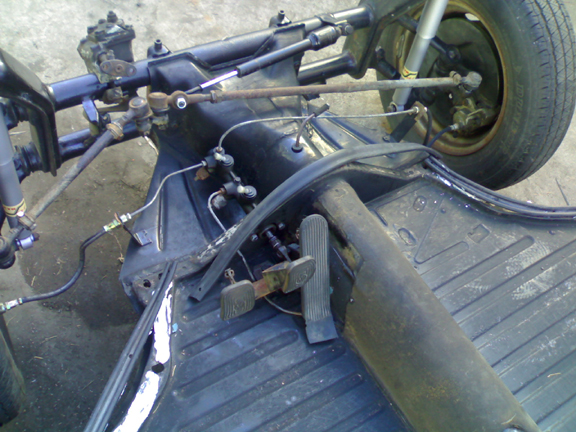
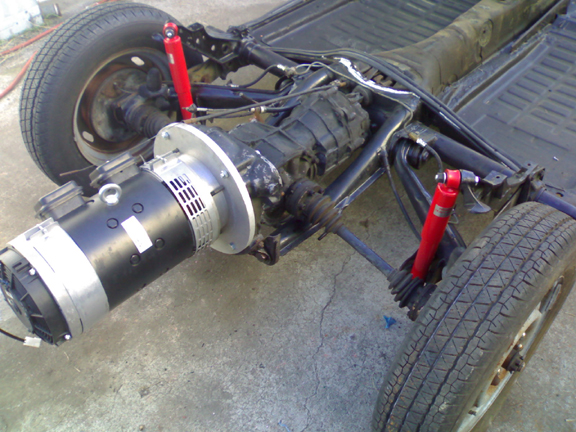
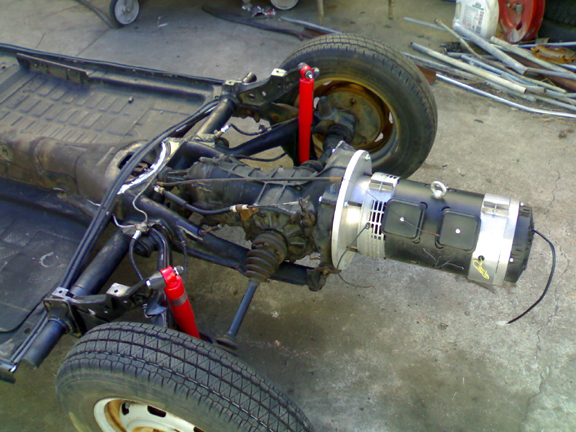
Many new parts were installed, and nothing escaped attention. The vehicle had been in service and I had even driven it prior to disassembly - and anyone who has ever seen me drive will tell you that I drive "enthusiastically." So I knew the suspension was tight. But just to be sure things are safe, the master cylinder was replaced, along with all the brake hoses. Whatever wasn't deemed serviceable, or "better to replace now" was replaced, such as the steering coupler, brake pads, bowden tube, etc. The rear axle joints had their grease renewed, the pedal assembly was removed and cleaned, clutch cable and hook lubricated, new gas pedal lever pivot pin installed - and lubricated, gas pedal hinge pin renewed - and lubricated, etc. All four shock absorbers were replaced with new KYB "gas-adjust" units, primarily because they add a little springing and that was deemed a good thing given the new battery loading. In short, it was fully serviced.
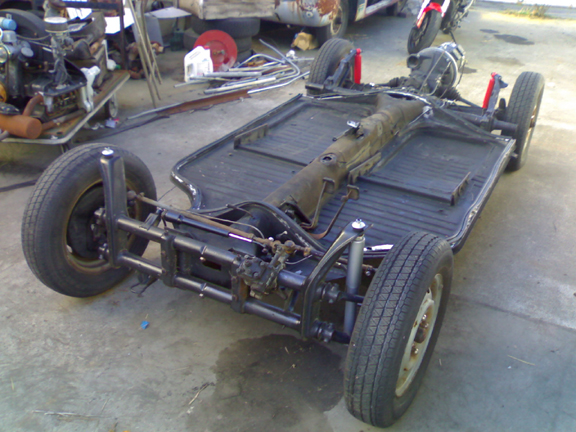
Here you can see the chassis in preparation for the remounting of the body - what Karmann called their marriage! The white material is sealing compound that helps the chassis to body gasket seal completely. The seal itself is laying in place, waiting for the marriage for proper positioning.
Note also in these images that while gasoline power is not going to be used at this time, the fuel line through the chassis has been fitted with new grommets at both ends and properly capped to ensure its serviceability in the future.
Frankly, I think the work is handsome. Too bad it's mostly invisible when it's complete!
NOTE the Okrasa engine on the dolly in the upper left corner of this image. Also note the KG at the top center - it is a '55...
The above images were taken while waiting for the paint on the body to dry and harden - literally!
Because there is no explicit section for "paint", I'll say a few words about it here as I had painted the vehicle just days before these images were taken and was literally waiting for the paint to harden enough to feel confident handling the body.
The body was painted in two very different steps: the "jambs" and "undersides" together, then the outer skin last. The first painting process involved painting it while it was hanging in the special Karmann Ghia Body Hoist seen earlier. This permitted getting paint underneath the new rocker sections to ensure that the whole structure has good paint. It also helps ensure that there's no shadow areas where the paint just didn't go as is so common in lesser-quality paint jobs. Only afterward was the body set down on the body-dolly-chassis (also seen earlier) for a more traditional paint job. I took photos of these processes but most are out of focus or the light's too dim.
Want to see more of this vehicle?
For the whole story, click here. For the previous part of the story, click here. For the next part of the story, click here.