For the whole story, click here. For the next part of the story, click here.
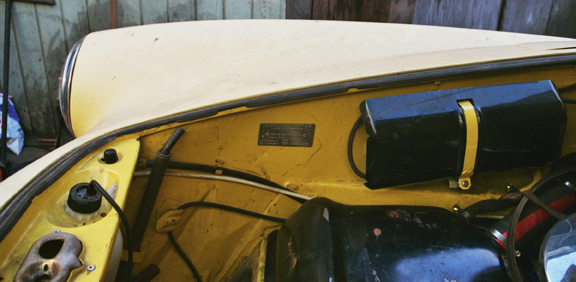
NOTE: Except where specifically stated otherwise, all of the images here were taken before I got the car - and hence the name of this section, "before."
The previous owner of this Karmann Ghia had contacted me, as founder of The Karmann Ghia Club of North America, looking for a nearby workshop. I referred her to a shop that helped her and she contracted with them for help with a restoration, but ended up abandoning the vehicle with them. I bought this vehicle at their auction when it was being sold for storage fees. At that point, a restoration had been begun but not gotten very far. The vehicle was in very good condition previously, except for the usual rust-in-the-rockers that ALL Karmann Ghia Cabriolets suffer from at some point.
When constructed, Karmann didn't actually paint the rocker structures - or any of the metal that got boxed into hidden caveties - but rather they dipped the body in a large vat of primer to about an inch below the top of the headlight buckets and then painted the shell's exterior. So, all interior surfaces are only primered, not painted, and therefore, unless someone has gone in there, this many years on, they're all rusty, it's only a matter of degree.
 Nobody
seemed interested in the car except for salvage until one day someone decided
they'd love to buy the car IF it were converted into an electric car! The idea
was a contract purchase for the car they way they wanted it, as opposed to them
purchasing it and then having it worked on.. Importantly, modification of the
body in any way that would prevent it from "being returned to stock"
fairly easily was refused. However, during the work, the buyer asked that the
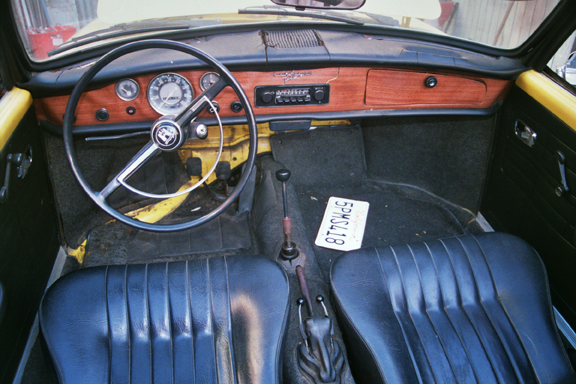
original stock dash - that was in pretty darned good condition, I think - be
replaced with an earlier metal dash, pre '67. I agreed to do this because I
also like the earlier dash and while not original to this vehicle, it is still
an original Karmann Ghia feature and to my eye - and many others - is more beautiful
than the younger style. (See the Bodywork
section for more information on the dash installation.)
Nobody
seemed interested in the car except for salvage until one day someone decided
they'd love to buy the car IF it were converted into an electric car! The idea
was a contract purchase for the car they way they wanted it, as opposed to them
purchasing it and then having it worked on.. Importantly, modification of the
body in any way that would prevent it from "being returned to stock"
fairly easily was refused. However, during the work, the buyer asked that the
original stock dash - that was in pretty darned good condition, I think - be
replaced with an earlier metal dash, pre '67. I agreed to do this because I
also like the earlier dash and while not original to this vehicle, it is still
an original Karmann Ghia feature and to my eye - and many others - is more beautiful
than the younger style. (See the Bodywork
section for more information on the dash installation.)
While not strictly "Before", please note:
Unfortunately, just as I am in the final stages of completing the work, the buyer has changed their plans, so I have put it up for sale again.
The vehicle can be completed as either a normal gas-powered Karmann Ghia, or as an electric vehicle! However, as I'll have no need for the electric equipment once this vehicle is together, I'm only selling it in electric-vehicle form.
As cited above, Karmann didn't even paint inside the rocker panels. By now virtually all Karmann Ghia Cabriolets are either rusted in the rockers or have had had it repaired. Far too many unlucky Karmann Ghias have a half-assed job attempted in which the damage is merely covered over, as with this machine in its "before" condition.
From here to the end of this section, along with the true "before" images, I've included what it looked like shortly after the work began, with the rust exposed. Notably look for the cracks and bubbles! Then, look at what was really hiding underneath! Ugh!
Unfortunately, many "restorations" feature the type of repair this vehicle had received, and for a long time - while it still looks good - the hapless owner doesn't realize what's lurking below!
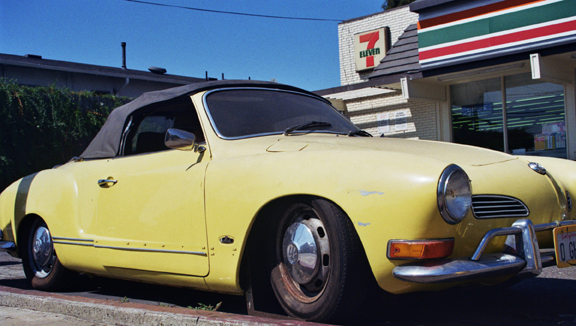
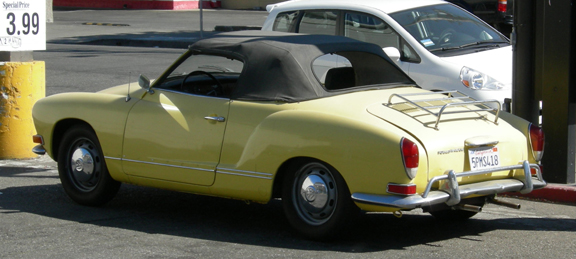
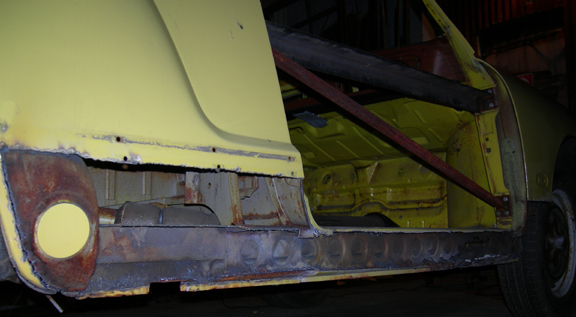
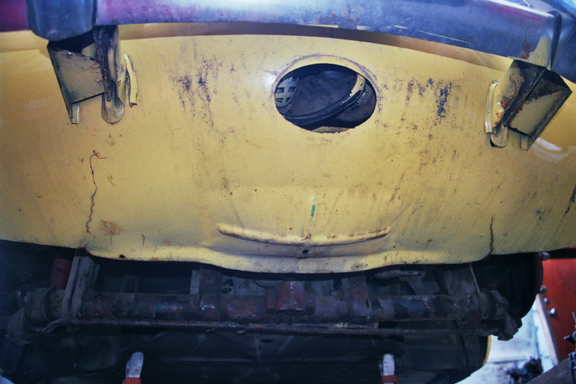
Street-eye views - "before:"
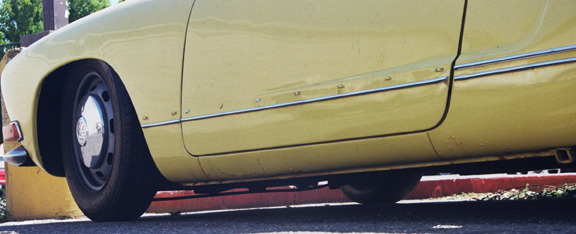
...Doesn't look all that bad, does it?...
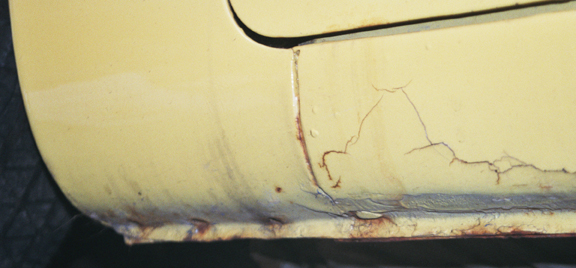
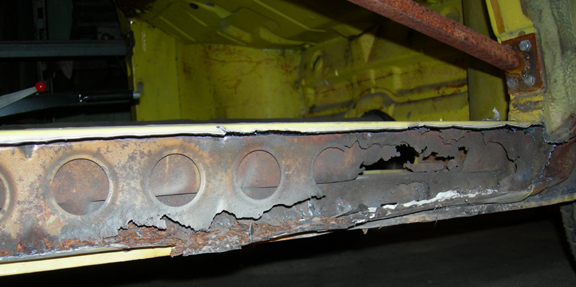
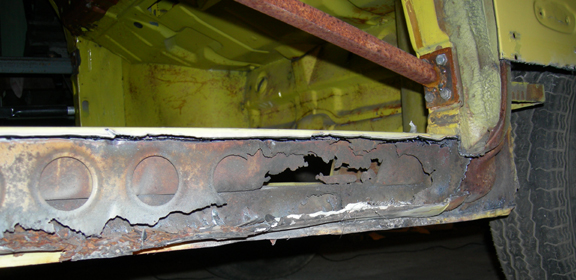
NOW what lurked underneath!
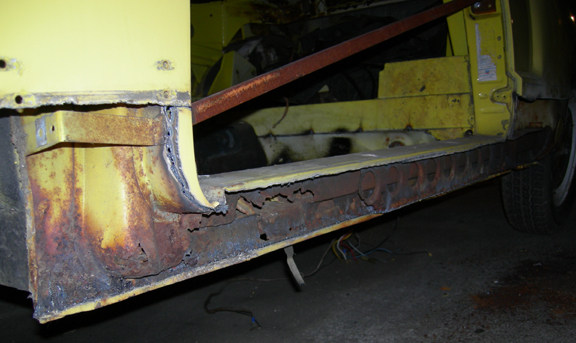
In the images above and below, note that the cabriolet-specific stiffener is completely rotted away! (Look for the circles - they're supposed to continue all the way to the hinge pillar!)
Wow, now that was bad!
How about the right side?
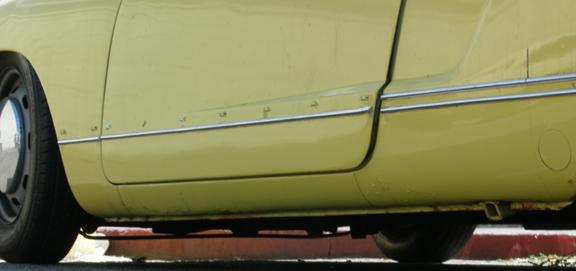
Starting with a "street view" is best, but there just aren't any
street view images of the right as with the left - other than what we can make
out in the other images above. However, this close-up shows that it in some
ways didn't look as bad as the left - no bubbles, just some cracking through
and a few lines with some rust seeping through: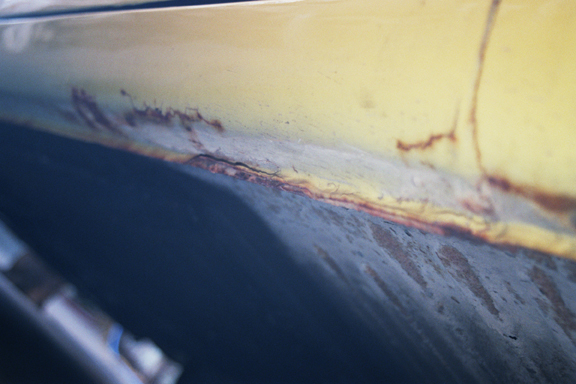
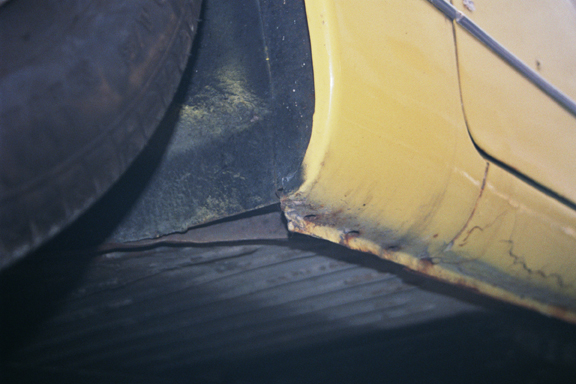
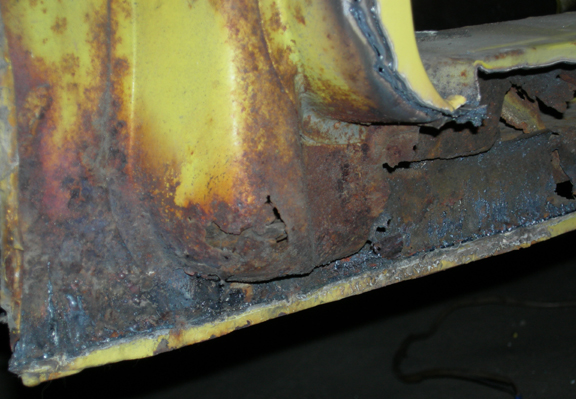
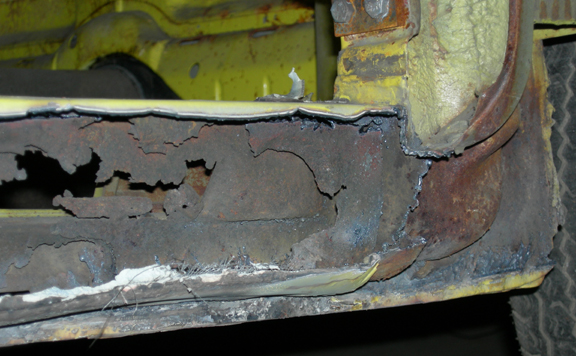
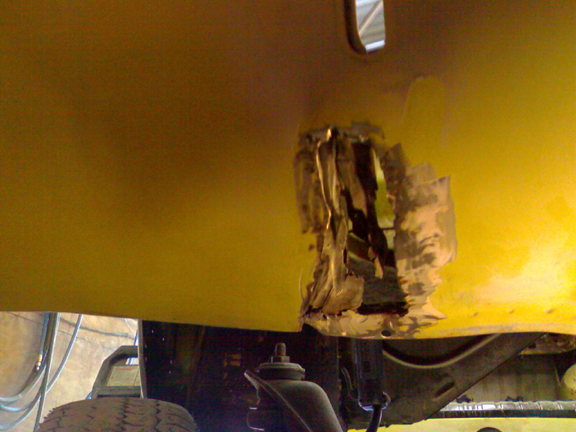
However, look what was hiding under the right side:
...All cracks in plastic body filler should be presumed to hide "imperfections" like those shown in these images...
Horriffic, isn't it?!
In the next image, note the fiberglass used - this is why the right looked better; fiberglass hides rust better than plastic filler does!
OK, that's the worst of it. In fact, if it weren't for that, the car would be considered in great shape!
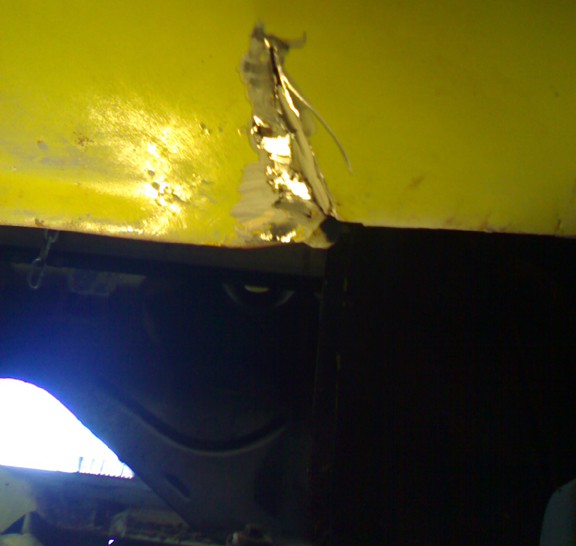
However, there was a little more to deal with. Note the cracks starting at the lower edge and working their way toward the bumper arms. This type of problem is not quite as common...
First the right side. In the image below, the rusted metal has been removed and only solid metal remains. (The material "above" the outer skin is the rubber Karmann used between the inner fender panel and the outer skin - it is renewed later in the process shown here.)
Now, the left, which has not yet had all the rusted metal cut away, only the extent of the "crack" revealed. Please note much later in the process, these areas have been repaired; new metal pieces were cut to size, welded in, ground down (top and bottom), and then later painted.
Want to see more of this vehicle?
For the whole story, click here. For the next part of the story, click here.