
For the whole story, click here. For the previous part of the story, click here. For the next part of the story, click here.
When I began work, a restoration had been begun but had not progressed beyond opening up the rockers to confirm their status (significant rust), and disassembling the entire vehicle in preparation for restoration. (Find images of the opened-up, but still "as is" rockers in the Before section.) The vehicle was in very good condition previously, except for the usual rust-in-the-rockers that ALL Karmann Ghia Cabriolets suffer from at some point.
When constructed, Karmann didn't actually paint the rocker structures - or any of the metal that got boxed into hidden caveties - but rather they dipped the body in a large vat of primer to about an inch below the top of the headlight buckets and then painted the shell's exterior. So, all interior surfaces are only primered, not painted, and therefore, unless someone has gone in there, this many years on, they're all rusty, it's only a matter of degree.
Key Observations In The Bodywork Section:
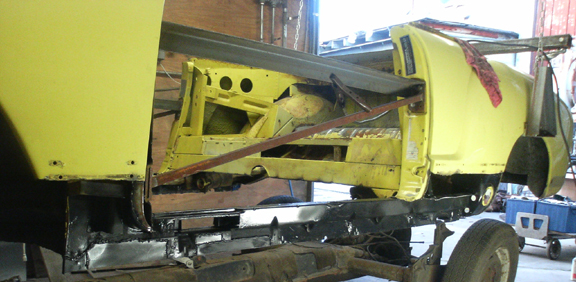
In the images involved in this story, pay attention to the hoist I use to lift (and work on) Karmann Ghia bodies. I have two such hoists and they replicate the original design used by Karmann when the cars were first manufactured.
Also note the use of a body-dolly which is an old Beetle chassis. Its only purpose is to help move bodies around while protecting the original chassis from paint, welding, etc. Observe that the chassis used as a dolly has no floor sections whatsoever!
Don't overlook the door-opening braces either! These are key to protecting the fit of the doors following major work like replacing the rocker sections.
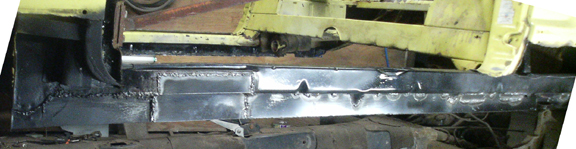
In looking at the images in this section, there are lots of welds visible, but the images are often in too stark a relief to see clearly. Typically, one sees either washed out whiteness or some shade of black. Most of the welding done here was with a MIG unit, which feeds in wire and steriotypically leaves blobs on top. Because only the welds on the outer skin are visible (other than in these photographs!), so long as any particular weld was unimportant for fit and not on the outer skin, they were left as-is following (mostly MIG) welding - that is, they were not ground smooth as it's unnecessary
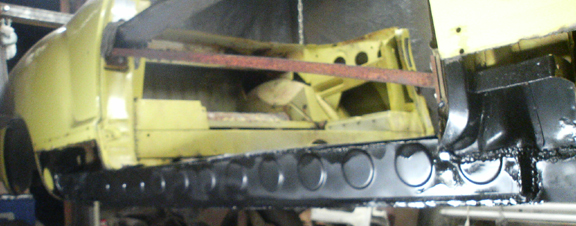
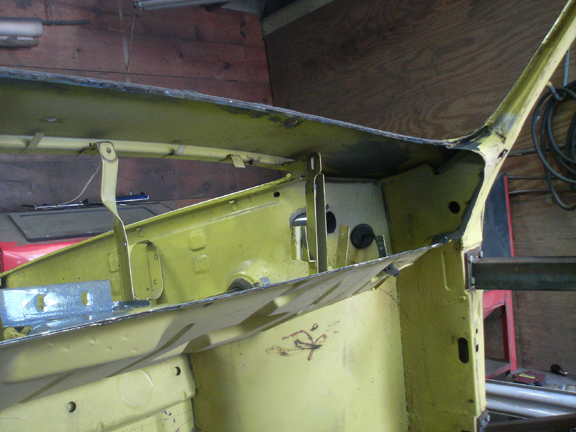
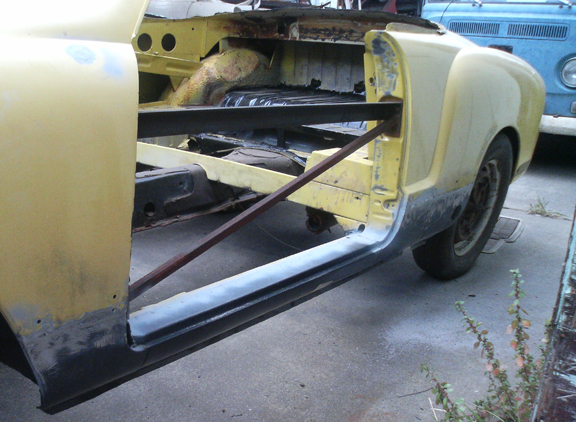
Photographs are unavailable of the earlier stages of rocker repair, and we pick up the story with the right side rocker mid-way through. Most people are unfamiliar with the construction of the Karmann Ghia Cabriolet rocker structure. It's a complex area. There's an inner skin that is visible to occupants if the carpets and other lining are removed, and there's a section with "weld nuts" that provides a surface for the body to mate to the chassis ("floor pan") - these parts are shared with the coupe' model. Then, visible below, there's an inner panel that's often associated with the heater system as it helps prevent hot air from escaping through the rocker structure, however, it also provides a lot of structural integrity - this part is also common with the coupe'.
Here's the forward end of the right hand side of the rocker structure. The outer skin, in yellow, has been cut away for access. We're looking at a rocker structure that has already had all the damage cut away, the remainder media-blasted clean, painted with POR-15 (the leading brand of paint for rust-prone areas), and some new panels welded into place.
Above we see the inner structure with new metal welded in - the long flat rectangle mounted vertically in the lower section. The upper portion(s) it is attached to are the original inner-most metal in the back (farther from the camera) and new metal used to rebuild the lower hinge pillar area (foreground right). Not seen here or in the photographs below: The opening opposite where heated air enters the cabin was closed with new metal. Also, the hinge pillar (visible here just below and behind the two holes in the outer skin, dead-center) had been rusted at the very bottom and the rusted section was already cut away in the image above. The bottom was closed off with a horizontal panel before the installation of the stiffener, shown below a few images down. (The new bottom of the hinge pillar is certainly stronger than the original metal was due to the direct tie-in of the hinge pillar to the stiffener.)
Whenever during the course of such work that the POR-15 used to protect the metal gets scratched, ground away or otherwise compromised, I am careful to apply more over the top, but sometimes, for access reasons or time to cure, it gets covered with enamel. You can pick out a few such places in these images where you see the texture change.
OK, and below, we see the rear section of this same area:

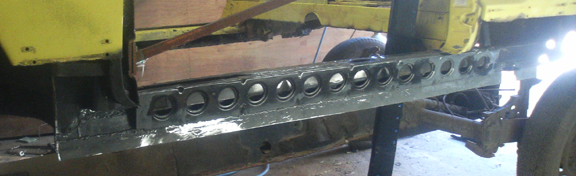
Next, (below,) I installed the stiffener unique to cabriolets. Note that the right and left sides have stiffeners made by different manufacturers! This was purely due to availability issues - neither type was available as pairs at the moment they were needed.
The one on the right (shown in the image below) is least like the originals, but is probably stronger.
Again, note the extra paint applied along the top edge. You simply cannot have too much paint protecting your rockers!
Now for the left side - I took more photos of the left side...
First, below, we see the inner substructure mostly already repaired. You can see that many patches were used. Note that these areas were patched instead of attempting to replace the entire section for a few reasons. Fundamentally, the wholesale replacement of the rocker sections eliminates all the normal points of measure, and the effort required to ensure new pieces are mounted in precisely the same locations as the old ones were is quite large, the risk of error is significant and the cost of remedy is great. Simply, if you don't have to cut out the inner structure or the surface where the chassis (floor pan) mounts, don't. Secondarily, there is no accurate reproduction for the stiffener that's common to both the coupe' and cabriolet - its replacement without replacing the inner most skin and area where the chassis mounts is non-trivial. So, patching is a pretty good solution, and can be made even better when, as in the case of my work, the thickness (gauge) is greater than the original.
Now, with the last of the sub-structure patches applied:
I always trial fit pieces, and on this side I found a serious problem. Note in this image (below) that I've tacked in place the convertible-only stiffener. (Yes, this one is the one that's most like the stock stiffener.) Pay close attention to the metal at the bottom edge.
Now note the same area with the stiffener welded in - and coated with POR-15 (the gloss gives it away) - and note that there's more metal below the stiffener. This piece had to be added in order to accommodate the outer skin properly. I'll show you why a bit further down.
Alright, why did I have to do that? Take a look at the bottom edge of the outer skin in the next photograph. Yes, the rocker skin is welded in already, but look for the lower edge of the rocker skin ("on top of" the strip shown added in the image immediately above) as it runs fore-aft. Roughly where it meets the back edge of the door (below the "lock pillar"), you'll see that it dips down at this point, lower, toward the ground. If I had not added the extra metal for the skin to weld to, that portion of the outer skins lower lip would have "run off" the rocker's substructure in that area.
I'm not entirely sure why this piece was short. I have an NOS rocker skin hidden away; maybe someday I'll measure things very carefully and be able to report back where the fault on this lay - was it my fault for not making a tall enough repair to the original substructure? I think not! More likely, the reproduction skin isn't quite what the original was. But, it doesn't matter so long as the parts are welded in properly and it's all sealed up nicely. ...Do note that I subsequently cut off the extra material, keeping the line horizontal.
Finally, the front area. On the right (shown several images above), the stiffener was sufficiently long that it went under the reinforcement piece that strengthens the hinge pillar area. So, instead of having to cut it off, as the hinge pillar stiffener was rotted away at the very bottom, I just tied it in to the rocker stiffener and I'm sure it's stronger than new.
However, on the left (shown here), this more-stock-like convertible stiffener doesn't go far enough forward to do that. So, if you look very carefully - it's all black! - you can see that I added two diagonal guessets to the bottom of a very thick metal plate we welded to the bottom of the hinge pillar reinforcement stiffener. What you can't see at all is that we used a very thick piece of material in the fore-aft direction - and welded it in from the back-side, too - just at the bottom of the reinforcement stiffener. These pieces were made out of bar stock and welded with heavy gusseting.
While a new hinge pillar reinforcement is available, the reason I didn't replace it was because the hinge pillar stiffener was rotted away only at the very bottom.
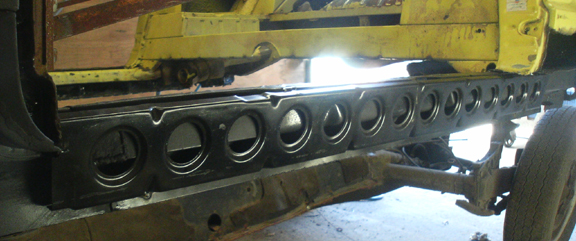
Following this, the remaining four pieces of fender skin were installed, the rear ends of the fronts, and the front ends of the rears, and having done so, the entire rocker structure repair was complete. Next up was the dash.
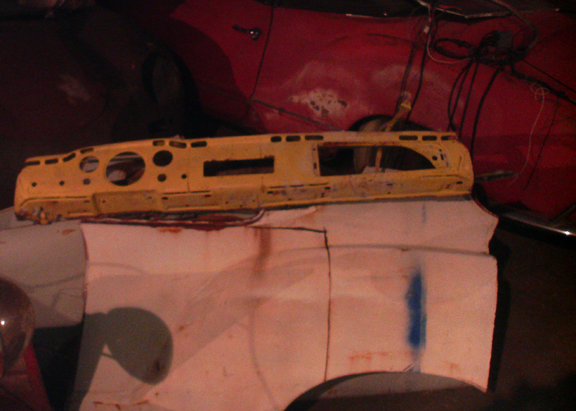
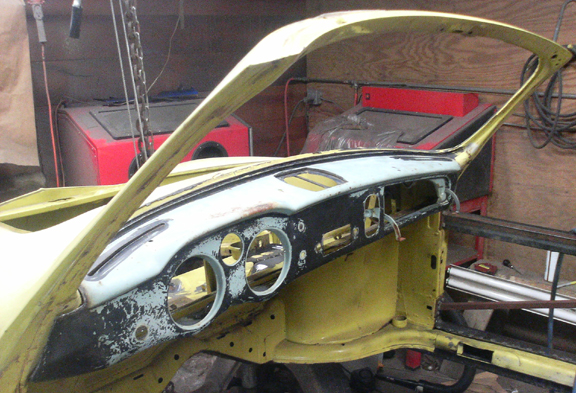
As reported previously, the contracted buyer asked me to replace the dash with one from an earlier car. So, I sourced the replacement dash first, then got out the plasma cutter and removed the original dash - at the moment it remains available for someone who needs to fix a younger Ghia!
Here's the cut out dash:
Here is the hole I left behind - now ready for the "new" dash!
OK, so far so good - how well did I do? Hmmm, trial fit, of course!
All right, now weld it in!

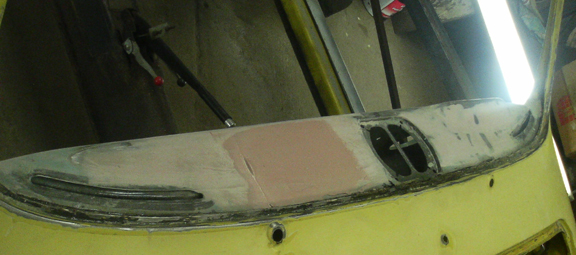
Now it's welded in, and ONLY now can I "surface" it correctly, in the same order as the factory did, though the earliest cars had much better steel pressings and had a lot more bodywork attention given to the dashes as they were welded in. This surfacing cannot be done prior to installation because the surface level of the dash is dependent upon the exact alignment of the lips of the cowl and dash pressings at the windshield's mounting lip. Thus, I continued on as follows - note multiple applications of plastic filler was required in the area between the radio grille and the passenger side air vent:
I don't have any specific shots of it, but at this point, I double-checked that ALL the underneath areas were thoroughly painted with POR-15, not only the rocker areas that were worked on, but all the other areas, too. It took several passes to ensure there were no places that were not fully protected.
It is important to note that the customer did not wish to pay to fix all the body's problems, but was willing to pay to fully apply POR-15 on the areas we were to leave alone. I was happy for that because I couldn't imagine leaving anything to rust. It's also worth noting that after it became clear that the buyer was backing out that I revisited the quality of the bodywork and improved all the areas the former buyer was willing to ignore.
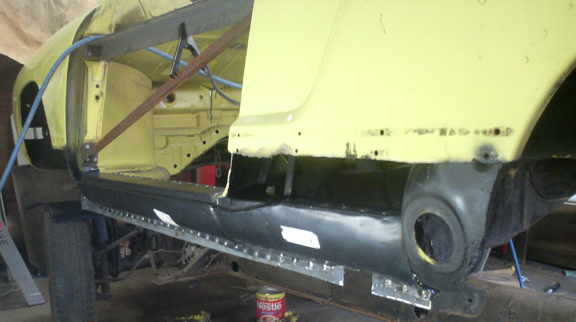
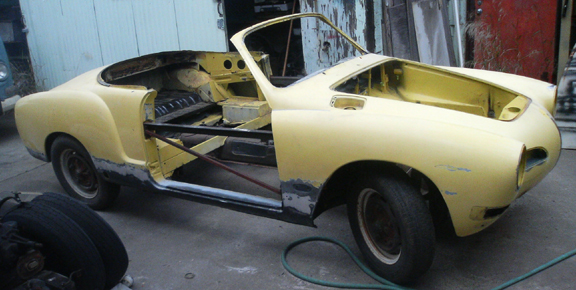
Now, with all the metal work done and all the painting underneath behind me, it's time to put the body on the dolly so it's not moving around while trying to do the sanding and other finish work.
I did a bit of plastic work on the weld areas of the outer skin in the vicinity of the rocker repairs and then later wheeled the machine out of the bay and took this photo.
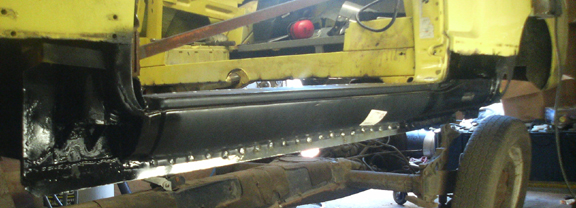
And lets not ignore the left side, though it's up against the shed:
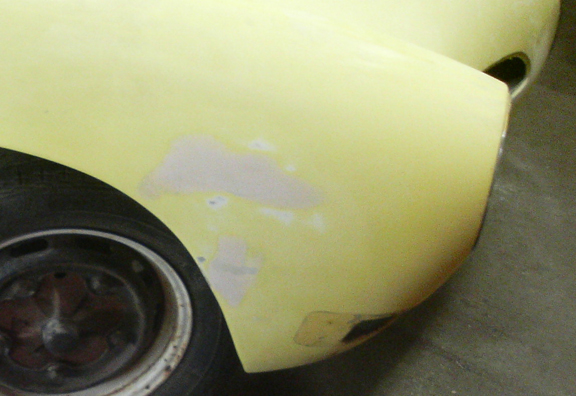
Ouch, there's a nasty scratch in the front right fender. While I knocked all the dents out and the metal is at the right "height", there was a significant gouge into the metal itself:
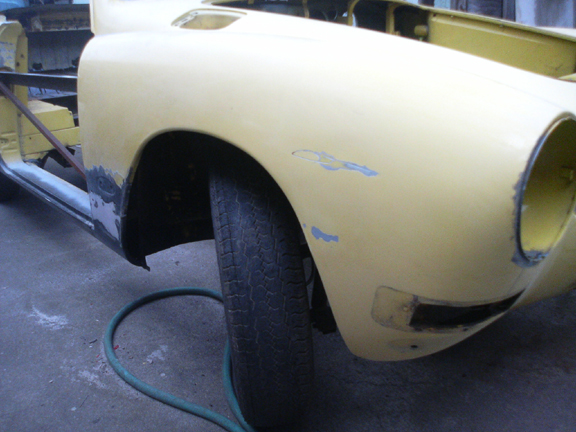
So , I filled it:
At this point the vehicle was shot with catalyzed primer and sanded smooth. Several applications of primer were required in a few places. And difficult places like the rear decklid louvers were carefully attended to. Unfortunately, there are no photographs available of these steps.
Want to see more of this vehicle?
For the whole story, click here. For the previous part of the story, click here. For the next part of the story, click here.